Power of Light to get stunning images - 4 things to keep in mind

Understanding the power of light is an important aspect of photography to consider. Light is crucial because it has the ability to transform an ordinary image into something amazing. To capture those stunning photographs, one must be able to sense light, comprehend light, the direction of light, the moment the image is captured, and understand the camera sensor so that the same is caught in the final image output. Well, that's the power of light or the importance of light in photography.

Himalayan Yak

What is the significance of light in photography?

Power of light has the ability to turn light and time into something tangible. We all speak the same universal language, and amazing images express so much in an instant, without the need of words or sound. We think in static pictures, and they help us remember things. Strong lighting gives a shot more depth and emotion. Soft light allows you to photograph subjects in a calm, peaceful environment. The direction of a light source has a big impact on how we perceive it and how an object in a scene appears. Front lighting, for instance, does not disclose shape.

What are the characteristics of light photography?

Satsar campsite

Power of light - Quantity 

The amount or power of light is also known as the intensity of light, and the concept is simple: how much light is there when you enter into a room where you plan to take a photo? Similarly, everything is underexposed when you step into a dimly lit environment. A camera operates in a similar manner. However, unlike the human eye, which must adjust to its surroundings naturally, we can regulate the intensity of light within our camera by adjusting the ISO, aperture, and shutter speed.

If you're photographing a scene in bright sunlight, your ISO will be lower than if you're capturing the same picture at night. Similarly, in broad sunshine when the power of light is high, you'll want a quick shutter speed or a tiny aperture to go with your low ISO to avoid a blown-out shot.

Golden hours - Natural light Photography

The time of day when the photograph is recorded is quite critical. When compared to photographs acquired during the daylight under strong light, you obtain the greatest results when you capture images during the golden hours, in the morning at dawn and in the evening at sunset. What I like about the light during golden hour is that it gives my photos a dramatic feel. Photography feelings and emotions can be expressed in this kind of images.

power of Light

The beautiful orange hue in the Arabian Sea is due to the sunset, as seen in the above photograph, and the reflection of light is caught. It's crucial to find the correct light for your image, and the time of day counts a lot when it comes to capturing that spectacular shot. Typically, images taken during the day or at midday are flat and too bright. The use of a polarizer will undoubtedly aid in the creation of those glare and reflections.

Your camera may also be used to regulate the strength of light. Although the aperture, ISO, and shutter cannot replace golden hours, you may manage the amount of light that enters the sensor by adjusting the aperture, ISO, and shutter. Warm light seems nicer and has a more attractive impact on the human eye, which may be achieved by changing the kelvin value from colder (blue) to warmer (yellow/orange) in post-production or by changing the white balance in the camera settings.

Only during the golden hours will you be able to catch the natural warm light on your camera. As a result, be prepared with your image's composition and catch it when the light is warm. Understanding the power of light can greatly assist you in capturing those amazing "Wow" moments. Checkout my article on Golden Hour – A truly magical hour to get the best of best photos.

Dal lake at night lonely planet

Here is an image of mine captured at Dal Lake, Kashmir, India late in the evening soon after sunset published by 'Lonely Planet'.

Quality of light

The quality of light is more difficult to judge than the amount of light. Instead, it is determined by our perception of light. Hard lighting is a type of lighting that is harsh, directed, and can throw long shadows. It may make photographing conditions challenging, such as portraits taken outside. Hard light, on the other hand, isn't always a bad thing; it may be employed creatively to give dramatic flair to your photos.

Miramar Beach to Dona Paula Goa Trekking

Soft lighting, on the other hand, is diffused and comes from a non-directional source. It can aid in the creation of smoothness and the elimination of those sharp shadows that are common under harsh lighting. Soft lighting may be found in the natural world, such as when the sky is cloudy or when sunshine rushes in through a window.

Direction of light

The way light falls on your subject has an impact on its overall look and, as a result, the final shot. Experimenting with light direction in a studio situation may help you fine-tune your subject's appearance and bring your distinctive vision to life. Things get a little difficult if you're filming outside.

When the sun is your primary light source, you can't shift it about as easily as you can with artificial lighting. However, you may move your subject about until you achieve the desired effect. With a rudimentary grasp of light and its qualities, you can work to control the environment and acquire the exact shots you want as a photographer.

Hope you enjoyed reading this blog post on power of light and how important it is to consider to get some stunning images. Buy me a coffee to support my work or you can go to my store to buy some of my images. Also, do not forget to join my FriendZone by signing up for my newsletter. Consider subscribing to my YouTube channel.


Hiking in the beautiful Benaulim Beach - South Goa Trek - Day 3

The third day of the Youth Hostel Goa trekking consists of a long flat 11-kilometer walk from Benaulim beach to Cansaulim beach. In between, we visited some well-known most beautiful, and cleanest south Goa beaches. This location is great for spending time with friends while on vacation.

What to expect on day 3 of Goa trekking?

We packed our belongings and walked the rest of the way. In little time, I had seen the majority of the so-called famed beaches in southern Goa. Sernabatim Beach, Colva Beach, Betalbatim Beach, Sunset Beach, Majorda Beach, Utorda Beach, and Arossim Beach were all visited. For a variety of reasons, this is a perfect location.

Benaulim Beach - Cansaulim Beach

I saw pricey water activities, parasailing, surfing, boats, kids playing, fishing, beach volleyball, and intoxicated people. I even noticed family photoshoots and destination wedding celebrations taking place on the coast. The majority of Goa's resorts and fine hotels are concentrated in this region.

South Goa beach is a beautiful location with a clean beach that is less congested, making it perfect for New Year's Eve celebrations. A lovely location for water sports such as speed boats, parasailing, and a variety of other water sports.


Few commonly asked questions

Is Benaulim beach safe to visit?

Absolutely! One of the cleanest and safest beaches in South Goa. This location attracts a large number of international tourists and is less congested. Beach hotels in Benaulim are popular in this region.

Does Benaulim Beach have shacks?

When visiting Benaulim Beach, stop by this picturesque beach hut for some delicious steaks and mashed potatoes. Thursday nights are especially lively as well-known DJs spin vintage, techno, and rock oldies. If you want to dance to the music, there's also a hardwood dance floor.

Ravindra Joisa at Benaulim Beach, South Goa, India

Which beach is better colva or benaulim?

Beaches in and around Colva-Benaulim. Benaulim is around 2 kilometers distant from Colva and is more tranquil and serene than Colva. Benaulim offers a retreat to experience nature in all its splendor with few people who do not disrupt its quiet. The historic Portuguese homes may still be seen.

Is Benaulim beach in North or South Goa?

Benaulim is a hamlet in the Indian state of Goa. It is located in the Salcete taluka of the South Goa district, and it borders Colva village to the north, Margao to the northeast, and Varca village to the south. More on Benaulim beach can be found in Wiki.

Camping overnight and the next day

Even though it was a long flat walk, the beach was a lot of fun and we camped overnight at Campal Sports Complex. The next day, day 4 of the Goa trek saw us enter the rain forest of the western ghats, beginning with the train ride and continuing with the climb to Dudhsagar basecamp, which required us to cross many streams. More info here - Day 4 – Cansaulim to Dudhsagar Camp. The place is known for some endangered wildlife.

Check the complete details of 10 days Goa trekking expedition. Hope you enjoyed reading this blog post. Buy me a coffee to support my work or you can go to my store to buy some of my images. Also, do not forget to join my FriendZone by signing up for my newsletter. Consider subscribing to my YouTube channel.

Controlling picture taking process to capture exceptional images

Most people make this common mistake of not knowing in and out of their camera and have no clue about controlling the picture taking process. Whatever your camera is, whether you have an expensive high-end full-frame or an entry-level camera body if you don't know how your camera works then there is no point in investing so much money on camera gear.

Controlling picture taking process

The exposure triangle

Learn the technical stuff about cameras first irrespective of the camera that you have. Once you buy a camera, learn what each button does and what options you have for that camera. Once you know these settings and buttons, picture taking process becomes easy. It is like knowing where the gear, breaks, clutch, and accelerator are, knowing where the indicator switches are while learning to drive. Once you master these you don't have to think about these while driving as we do these automatically without even looking at them. The same is the case with your camera settings. Once you know where and what these settings are and when to use them, the picture-taking process becomes much easier.

How do you do these? Well, first go through the manual or videos available online and know what each button does. Get familiarized with these buttons and settings present in the camera menu. Second, understand the basics - Aperture (check - basics of aperture), Shutter, and ISO, also called the exposure traingle.

We use a handful of the photographic skills we've studied to construct photographs, but it's primarily an unconscious act of applying what we've learned that results in a nice shot. Using diagonal lines, the rule of thirds, framing our topic in a specific way, and so on. This is critical for being quick and making judgments, but it also raises the chance of repeating the same photo "template."

Practice the picture taking process

Sit in one place, with the same subject in front of your camera, play with these three and compare the images. Next, think about composing images. I have seen many who capture in Auto mode. I don't say that auto mode is wrong. But, use auto mode once you know the manual mode in-depth and explore those possibilities that your camera can capture, which cannot be captured using auto mode or in other modes.

Capture Cityscape during Nightfall

If you already know about the picture taking process, then try to play around with natural and artificial light, tripods, long exposure shots, filters, and polarizers. Once you master these which comes by practice, you don't have to worry about the technical side of an image or the picture-taking process, and instead, you will start enjoying photography.

Observation and anticipation

Because the photographer is aware of their surroundings, they will take less time to make key decisions like how to use natural light or which foreground and backdrop to employ. This is especially important when building a picture that includes the subject at the very end. A wedding photographer shooting candid images is the best example.

The next ability to develop in picture taking process is anticipation. Moving ahead with the photo concept, predicting where a possible subject will be and where the light will change, is critical to capturing a stunning shot. This necessitates being physically healthy enough to move rapidly, especially in crowded situations such as a wedding or an event.

Hope you enjoyed reading this picture taking process blog post. Buy me a coffee to support my work or you can go to my store to buy some of my images. Also, do not forget to join my FriendZone by signing up for my newsletter. Consider subscribing to my YouTube channel.

Lidderwat to Shekwas: Extraordinary journey in the Paradise | Tarsar Trek - Day 3

Day three of the Tarsar trek is a gradual climb from Lidderwat to Shekwas campsite. You gain about 1600 feet on this day, from 9100 feet at Lidderwat to 10700 feet at Shekwas. Following an hour of a steep climb, there is another hour of a flat walk. There is a place where you need to cross the stream, walk along the stream for a while, and then gradually climb till you reach a place full of boulders. Once you cross these huge boulders, you are at the Shekwas camp site.

Lidderwat to Shekwas - Tarsar Marsar trek

If you have not gone through my previous two days of the Tarsar trek, then check these out:

Tarsar Trek – Day 1 – Srinagar to Aru drive

Tarsar Trek – Day 2 – Aru to Lidderwat

Lidderwat, a lovely campsite

Lidderwat is a famous local place. Many visit this place as it is a one-day trek and is considered an ideal place for a nice weekend hike. There is enough space to camp here, and the water source is not a problem at Lidderwat campsite. There are PDA (Pahalgam District Authority) guesthouses where you can stay. You can even request and stay in local Gujjar huts, maybe for a small fee, but it is nice to stay in their hut to get that unique experience. This is a lovely campsite with stunning mountain peaks on all sides and streams on both sides. Sunrise and sunset at this place make it an ideal place for some time-lapse photography.

Exploring the wilderness on the way to Shekwas

Soon after having breakfast, we packed our bags and were ready to go. It starts with a zig-zag climb up the hill right behind the PDA guest house. As you climb up, don't forget to turn around and see your campsite from above. The shadows on the nearby mountains fall on the mountain opposite that, and the sun's rays, or godly rays of light, are truly magical. As you climb further, you enter the pine forest. Continue further until you see the stream far below.

Walk all the way down and continue right next to the stream for another kilometer or two. You get to see a few huts of local Bhakarwals, Gujjars, and shepherd's houses. Right next to this is a place where you can cross the stream. It is ice cold, and you can get yourself refreshed and have your packed lunch as well. Continue further parallel to the stream, and the trail next is a gradual climb right next to the stream.

Crossing the slippery boulders and ice-cold water can be extremely challenging for these sheep. and a few even fell down while crossing. They just jumped, maybe because we were around and wanted to reach the other side of the river in no time. Luckily, the shepherds take care of each of them and make sure all of them cross. It took almost 15–20 minutes for a few hundred sheep to cross the river, and we had to wait for our turn. The local Gujjars and Bhakarwals come to this place during the summer so that these animals can graze on the Himalayan slopes, and during the winter they go to cities.

The view from Homwas - Kalahoi Peaks

This place is known by the name Homvas. As you continue further, turn around to see the beautiful mountain peaks and the glacier. The peak that you see in the above image is Kolahoi Peak, which is 17,799 feet high. Right next to or below is the Kolahoi glacier, which is the source of the Lidder River.

Kolahoi Peak is 17,799 feet high, and Kolahoi Glacier is the source of the Lidder River. View from Homvas near Tarsar, J&K, India

If you have a telephoto lens, then it's a must to capture this peak. It's far away, and the view that you get to see is visible only for 10 to 15 minutes during your trekking trail. Many are not even aware of this as it is too far away or always cloudy, and people also don't turn around to see the beautiful landscape around them.

Enjoying the hike and the beautiful landscape

I'm not sure why people are in a hurry to reach the destination or the camp site. Instead, I would say to take your time, be with your group, and enjoy the beautiful nature and landscape around you. Photograph, if possible, so that you can always remember and see these places for the rest of your life.

Continue the trail, which is a gradual climb, till you reach a place full of boulders. To the right is the stream, and to the left are the Silver Birch or Bhoj trees. Here, you can either cross this river of boulders or take a different trail. These are huge boulders and can be difficult to cross. It takes longer to cross, and you have to be careful. You can avoid this crossing of boulders by climbing further. There is a Gujjar hut and a single lonely tree next to the hut. The view from this place is just awesome.

The final stretch before Shekwas

It's all green meadows, multiple streams, valleys, and huge snow-covered mountain peaks. Spend some time enjoying the beautiful landscape next to the hut. Continue to walk down for a while until you reach Shekwas. The weather can be very cold at night, with a cold breeze. Ideal place to get some galaxy shots at night. The campsite is next to the stream again, but the stream is a few feet below your campsite, so do not venture out at night.

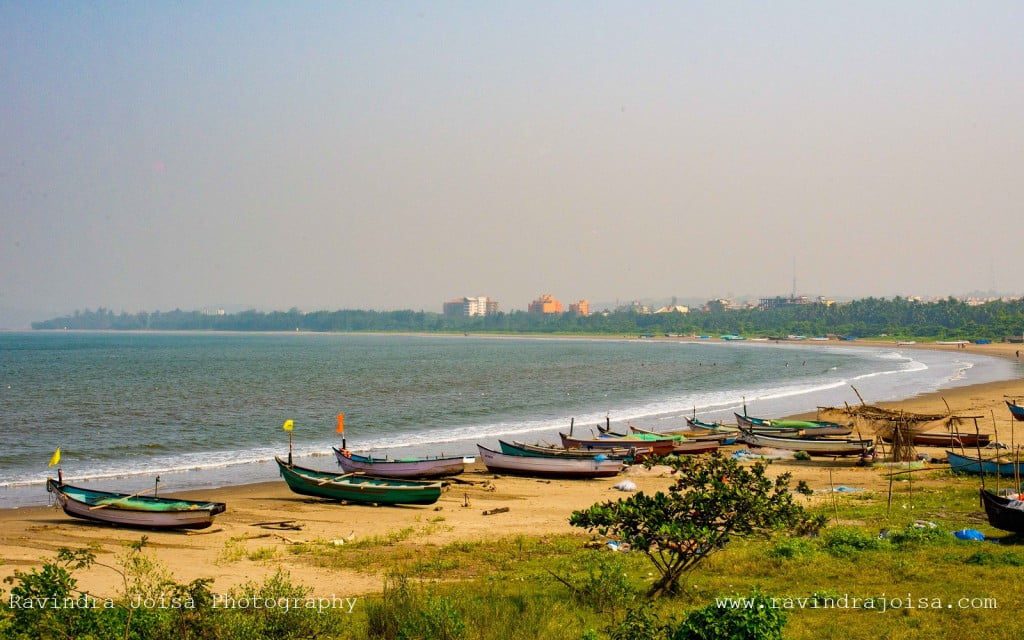
You may see a few fishing boats and lifeguards driving about in their vehicles. Enjoy your time at the beach before continuing your stroll along the waterfront for another 4.3 kilometers. As you walk the 4.3 kilometers, you will witness seagulls, gulls, more colorful fishing boats, yachts, and a distant lighthouse. As you near the end of the stretch, you'll notice a crimson wall that looks more like an old fort.

Goa Trek- Miramar Beach - Dona Paula - Ravindra Joisa Photography

Where is Goa Raj Bhavan view point

After a brief pause, begin a zig-zag ascent for 10 minutes till you reach the main entrance of the Goa government office - Raj Bhavan. The public will not be able to enter this area, however, the viewpoint is located directly in front of the entrance gate. You have a birds-eye perspective of the full 4.3-kilometer area you just traversed. It is worthwhile to photograph the countryside on a clear day.

Where is Dona Paula?

Continue walking along the concrete road depicted in the map above for another 1.5 kilometers until you reach the viewpoint, another popular tourist destination. This area is always congested, and there are far too many stores around. You may go on a water bike ride, a jet ski ride, or a sailboat ride. From this viewpoint, take in the breathtaking panorama. There is a tale behind the name of this place that I won't go into here, but you can find it on the internet.

Dona Paula Goa

Return to the police station area/bus stop. You have the option of walking all the way back to base camp or taking the bus. The second day was more of an acclimatization stroll. That was the second day of my trip to Goa. The true walk starts on days three and four in the western ghats when we reach the rain forest.

Don't forget to check out day 3 activities here - Goa Trek – Day 3 – Benaulim Beach to Campal Sports Complex. Check out the video below.

Check the complete details of 10 days Goa trekking expedition. Hope you enjoyed reading this blog post. Buy me a coffee to support my work or you can go to my store to buy some of my images. Also, do not forget to join my FriendZone by signing up for my newsletter. Consider subscribing to my YouTube channel.

Hiring Wedding Photographer? 5 common mistakes to avoid

When you engage a professional wedding photographer, the majority of people hunt for a well-known brand that will cover the event or be handled by an event management organization. Based on my previous expertise as a professional wedding photographer. I've compiled a list of typical mistakes people make when hiring, as well as what you should look for when picking a cameraman.

Hire Photographer not brand

Mistakes people make while hiring a Photograper

  1. This photographer's rates are very exorbitant; he must be well-known and really professional.
  2. Choosing a huge brand that has a photo studio in every part of the city.
  3. Allowing the event management firm entire control over wedding photographs while not knowing who the cameraman is.
  4. Bargaining excessively with a wedding photographer.
  5. Not investigating the photographer's creative professional work.

Expensive doesn't always mean better

Do not pick a cameraman just based on the price or the brand name. I've heard from a few older relatives that we engaged professional photographers from the XYZ brand for thousands of dollars. A larger price tag does not necessarily imply the best of the best results. Some photographers charge based only on what others charge, without considering how qualified they are.

Huge Brand doesn't mean better photo

The so-called brand XYZ will have many branches both within and outside of the city. These brands may have begun with a few photographers and photo editors and may have been successful until they acquired the brand name. They will undoubtedly have all of the necessary camera equipment to cover the occasion. In order to expand, these brands recruit more photographers and editors as they grow. These photographers and photo editors cover many events each week and are paid on a monthly basis or on a contract basis.

Candid Indian Wedding - Hands of Bride and Groom

All of the above are OK, but I do not suggest them since the cameraman engaged for the event by the major companies will not be concerned with the final product because he is working for someone else rather than his own brand. The same is true for photo editors.

These brands are not worth paying for the quality of images or prints they provide. Most assistants and photo editors are underpaid, and these companies are more concerned with earning money by billing clients than with quality when compared to individual photographers.

I see college and high school students being employed as cameramen by big businesses and these college students like doing it during their free time. They just press the shutter button without even learning the fundamentals of photography, and the rest is taken care of during post-processing. Imagine how effective the unknown photographer's work would be in capturing those crucial moments.

Wedding photography by Event Management Firm

In many situations, event management companies strive to keep as much profit as possible for themselves. Many people just leave it to an event management company to handle. It should be noted that even if you choose a cameraman of your choice, there are situations when changes are made at the last minute for a variety of stupid reasons.

For example, the reason given would be something like, suppose the requested cameraman did not show up and we had to choose our own cameraman; in reality, this will be pre-planned, but not always. The best thing to do in this situation is to make direct contact with the wedding photographer offered by the event management firm.

Bargaining excessively with a photographer

You might just ask him if there is any kind of discount once before the event. And that is the most you can do. Comparing your cameraman to other photographers, haggling after the event, asking the cameraman to cover smaller events at the time of the event when you were not notified beforehand, and requesting a complimentary album are all a no-no. The more you bargain, the more irritated the cameraman will be, and the image quality will suffer.

candid indian wedding photography

Check photographer's work

The work of a cameraman is typically posted on his or her own website and social media profile. You never know who the cameraman is or how skilled they are when you hire a cameraman from a brand. Individual photographers, on the other hand, concentrate and focus on their projects because they do not work for anybody. Individual photographers often cover 20 to 30 events per year and are more focused on their work. They execute the majority of the job themselves; they have their own way of catching those key moments, as well as the retouching/post-editing work.

You may look at an individual photographer's work before hiring them for an event. So, unlike the brand, you will know precisely what to expect and how wonderful their job is. By chatting directly with the cameraman, you may interact, modify, and plan. When compared to the brand, the terms and conditions are a little more lenient.

Hope you have learned something today by reading this blog post. Buy me a coffee to support my work or you can go to my store to buy some of my images. Also, do not forget to join my FriendZone by signing up for my newsletter. Consider subscribing to my YouTube channel.

Arrival at Panjim and our great expectations - Goa Trek - Day 1

Day one of the National Trekking Expedition in Goa with Youth Hostels Association of India (YHAI) consists mostly of reporting at the Youth Hostels base camp, which is located near the Swimming Pool in Campal, Panaji, and is approximately 3 to 4 kilometers from the Panjim Bus Stand. If you have already booked this excursion online or over the phone, you may arrive at the campground at any time of day.

Panjim - YHA Goa trekking

Where is YHAI Panjim Campsite located?

The campground is in a fantastic location, near to the Mandovi River, and offers good connectivity. Just outside the campground is a shop where you may get any last-minute supplies. It takes around 5 to 10 minutes to go to the campground from the Panjim bus station, and they charge about 8 to 10 rupees. Get out at the Swimming Pool station or shortly before the Times of India building. Cross the road and go about 50 meters to the YHAI campground on the right.

Exploring Panjim Campsite

If you arrive early, you will have the entire day to yourself. The market, which is located between the campsite and the Panjim bus terminal, is a great spot to wander around near to the campsite. You may take the bus or go for a long stroll along the Mandovi River. You will be able to watch the casino and cruise as they prepare for the late-night festivities.

On the other side is Miramar beach. Visit in the evening and enjoy the low tide walk along the coastline and the sunset. You can spend more time till it's dark at Miramar beach which is at a walkable distance from the campsite. Or, you can be at the senior citizen park next to our campsite and enjoy the evening view of sailboats.

view from Senior Citizen park

It's worth noting that there's a swimming pool immediately behind the campground. You may visit this location on day one since you will have plenty of time to explore while we wait for another trekker to join us. You may also enjoy Goa's nightlife on a boat party tour, which is not far away.

Where to stay in Panjim?

Hotels in Panjim? – Because Goa is a tourist destination, staying there should not be an issue. Even during peak season, especially around the holidays, hotel prices can rise. The cheapest option is to get a dorm room at a hostel, of which there are several, but you must plan ahead of time. Last-minute booking is a flat No, else be ready to pay more.

If you are coming directly to the YHAI campsite, you do not need to worry about a hotel stay before or after because your booking with YHAI trekking, cycling, sailing expeditions, family events, or nature study will cover your stay, but if you want to explore Goa, which you should, you may need a few more days.

Also, if you are a YHAI participant, you can extend your stay before or after the program by speaking with the local staff or the camp leader. We received assistance from them and stayed at the campsite for one more day, paying only 300 rupees more for meals and celebrating the New Year after finishing the hike. Hotels in Goa will undoubtedly be much more expensive at this time of year.

Keep things ready for the next day - day 2 where we go for an acclimatizing hike from the campsite to Raj Bhavan via Miramar beach. Then to Dona Paula and back to the campsite for lunch. Post lunch you may go for a river walk. Check Goa Trek – Day 2 – Miramar Beach to Dona Paula for more details.

Hope you enjoyed reading this blog post. Buy me a coffee to support my work or you can go to my store to buy some of my images. Also, do not forget to join my FriendZone by signing up for my newsletter. Consider subscribing to my YouTube channel.