Kanji - An Extraordinary village with some amazing people

Kanji village - Leh - Haniskot

Kanji is a Himalayan village that is incredibly secluded. The settlement is roughly 12 kilometers from Haniskot, which is located on the NH1 Kargil-Leh route and is only accessible for four months of the year. Kanji is well-known for its harsh scenery and the perilous path between Haniskot and Kanji.

Kanji photo by Ravindra Joisa

How to reach Kanji?

Kanji is 12 kilometers away, and the only route to getting there is through the settlement of Haniskot. Haniskot is located on National Highway One, which connects Kargil and Leh. Haniskot and Kanji are connected by a tar road. The road is part of India's PGSY (Pradhan Mantri Gram Sadak Yojana). The location is close to Foto La (pass) and Lamayuru. The location is great for a long weekend trip from Leh or for people who wish to ride their bikes about.

Route to Kanji Village

The route begins with a sharp downhill, followed by a 10-degree gentle ascent all the way to Kanji. Even though significant rain is exceedingly unusual in this region, the roadways are narrow and prone to landslides. The roads follow a stream (which appeared to be more of a river) all the way to the settlement.

The village Kanji

Kids from Kanji village

The majority of the population in this area are Buddhists, and there are three monasteries. There is only one food store and one Tea shop. There are 52 homes and a primary school in total. Despite the fact that this area is buried in thick snow for six to eight months of the year, agriculture is the major profession in this area. Fortunately, this location is now connected by an excellent road, which serves as a lifeline. Lovely folks to converse with, and the high school students like playing cricket.

There are numerous antique, traditionally constructed structures in the area. The Tibetan culture has had a strong effect on the community, as seen by the clothing. The community ensures that no political or religious pressures interfere with their way of life.

When I visited this location, I mostly saw seniors and young children playing cricket on the village road. The majority of the middle-aged males commute to adjacent towns such as Lamayuru during the week and return home on weekends or late at night.

Senior Citizen at Kanji village

I happened to visit this place during my National High Altitude Mountain Biking Expedition in Leh conducted by the Youth Hostel Association of India. This was an off-route visit. As we reached the campsite at Haniskot by lunchtime and had enough time to explore, we took our mountain bike to this beautiful little-known village of Kanji.

Hotels to stay

In this village, there may be fewer places to stay. You may have to camp in a tent or there may be a few houses stays available today. People are nice, so you may even ask for the locals. Another alternative is to stay in the Haniskot Government Guest House. Hotels in Lamayuru may be found if you walk farther, once you cross the Foto La TV tower and proceed all the way down. It is a little village that attracts travelers. Lamayuru is well-known for its lunar landscape and monasteries.

https://youtu.be/S27trVnk6PI

To summarise, this distant location Kanji is a must-see if you want to witness severe roads, a lonely community, and camping near to an agricultural area. There will be no telephone network, power, gas, or water supply. Water should not be an issue. There were government efforts underway to deliver power to this location, as well as an optical fiber project. This is an excellent location for anyone going by bike, vehicle, or campervan. Because many people are unaware of its existence, it does not receive a large number of visits. Watch the movie below to get a sense of my trip to this location, and don't forget to subscribe to my channel.

Takes 9 years to master - Thangka Painting - A Meticulously crafted artwork

Thangka painting has its origins in Tibetian Buddhist paintings. These paintings are made in Bhutan, Nepal, Tibet, and India. Thangka paintings are made on cotton, silk, and human skin depicting the 'mandala' (Mandala in Sanskrit means is a spiritual and ritual symbol representing the universe). Thangka paintings usually represent the life of Buddha.

Thangka Painting
The painting takes a few months to complete. An artist completing his painting work.

The Thangka Painting Gallery

There are multiple Thangka painting galleries in Bhutan and Nepal. I visited one of these galleries. The place is located next to an ancient paper mill in Thimphu town. The 'Thangkha Painting Gallery' is a school for many who want to learn as well as this place has some of the incredible paintings in the display room.

Visitors are not allowed to record or capture the final paintings. With permission, I managed to get the video and photos of those people who were working at this gallery. Thanks to the friendly staff. The gallery has paintings, craftworks, dragon masks, cloth items. The staff explained to us how it is made, the colors used, when and where it is used, etc.

Also read: 4000 years old Domkhar Rock Art Sanctuary

The Thangka Painting Gallery
The Thangka Painting Gallery. We were denied photographing the finished products which are inside the main gallery.

How is Thangka Painting made?

The detailed work, the amount of time and training involved in doing each of these paintings astonished me. It takes more than 6-9 years to master this painting work. Each of these paintings takes almost 1 year of work to complete. No wonder why these paintings are so expensive. The size of each of these paintings varies from A4 size to huge paintings, which are displayed in Monasteries during rituals or ceremonies.

Check out the video below where you can see the Thangka Painting gallery which is in Thimphu and people are busy with their artwork. These Thangka Paintings are super expensive and can easily cost 1000s of American US dollars. I have found a few online which is inexpensive but are equally good, ideal for home decor.

Most of the Thangka paintings are traditionally kept unframed and rolled up when not on display. These paintings are made of natural color and are very delicate, have to be kept away from moisture. These paintings depict the life of Buddha, mantras, various influential lamas, the visual representation of the art of enlightenment, etc.

https://youtu.be/wicAdpMcENw

At this art gallery, you will find professional artists painting with natural colors. Also, there are other handmade crafts, like the mask used in festivals where they perform the mask dance.

Traditional Paper Mill

Also, if you go a little further outside of this gallery, you will find the old traditional way of making paper. These traditional ways of making take time and money and this is the only mill that is present as of today. The papers are mainly used for artwork, paintings, manuscripts. The paintings and manuscripts are kept available for sale at this art gallery. Also, you get notebooks made of these papers which is expensive.

The traditional way of making paper
Inside of Paper Mill

Other places to visit nearby include the Thimphu Dzong, Buddha Dordenma - the World’s largest mountaintop statue of Buddha. Also, check the top 10 Spectacular places to visit in Bhutan.

In short, these paintings are beautiful. A close-up view of these paintings will show you the kind of effort that has gone into the making of each of these masterpieces. No wonder the finished product is so expensive considering the training it takes to make this, the natural colors, and most importantly the time it takes to complete just one painting.

If you enjoyed reading this content then you can buy me a coffee to support my work or buy some of my photos from my store. Also, join my friendzone and signup for my newsletter.

Buddha Dordenma - World's largest statue that is Vivacious

The world's largest mountaintop statue of Buddha Dordenma is located in the western parts of Bhutan, Thimphu. A must-visit place if you are in Thimphu. The huge structure of Buddha (Shakyamuni) is made of bronze and is gilded in gold. The view from here is breathtaking as it overlooks the southern entrance to Thimphu valley. Also, this mega-structure of Buddha Dordenma is located atop a hill in Kuenselphodrang Nature Park, Thimphu, the capital of Bhutan.

Largest statue of Buddha Dordenma

About the statue of Buddha Dordenma

The statue of Buddha Dordenma is 169 feet (51.5 meters) high. Within this megastructure are 125,000 smaller Buddha statues. Of this, 100,000 are 8 inches tall and 25,000 are inches tall. The statue of Buddha Dordenma is on top of a large meditation hall.

Two prophesies are fulfilled by the monument as well. The first, as predicted by yogi Sonam Sangpo, is the construction of a Buddhist statue in the area to "bestow blessings, peace, and happiness on the whole globe." Furthermore, Guru Padmasambhava, sometimes known as the "second Buddha," is supposed to have described the statue in the seventh century. By fulfilling both prophesies in a gleaming manner, this statue kills two birds with one stone.

Who built Buddha Dordenma in Bhutan?

This is a brand new structure that was built recently. The statue was built at a cost of US$47 million by Aerosun Corporation of Nanjing, China, and was financed by Singaporean billionaire Rinchen Peter Teo. The overall cost of the project exceeds US$100 million. These hundreds of smaller Buddhas, like the giant Buddha, are plated and made of bronze, which is one of the reasons the statue cost about $100 million to create when it was built in 2015 to commemorate the 60th birthday of Jigme Singye Wangchuck, Bhutan's fourth monarch.

Buddha Dordenma - Ravindra Joisa - Twitter

Where is the Buddha statue located?

The drive to this location is scenic. To reach this place from Thimphu, you can drive to the backside of the structure or park in front, but there is a staircase all the way up from the main entrance. Once you climb the stairs, the open space is big enough to accommodate a few thousand. The statue of Buddha Dordenma is sited amidst the ruins of Kuensel Phodrang, the palace of Sherab Wangchuck, the 13th Desi Druk. I would recommend going in the evening to enjoy the view from the top.

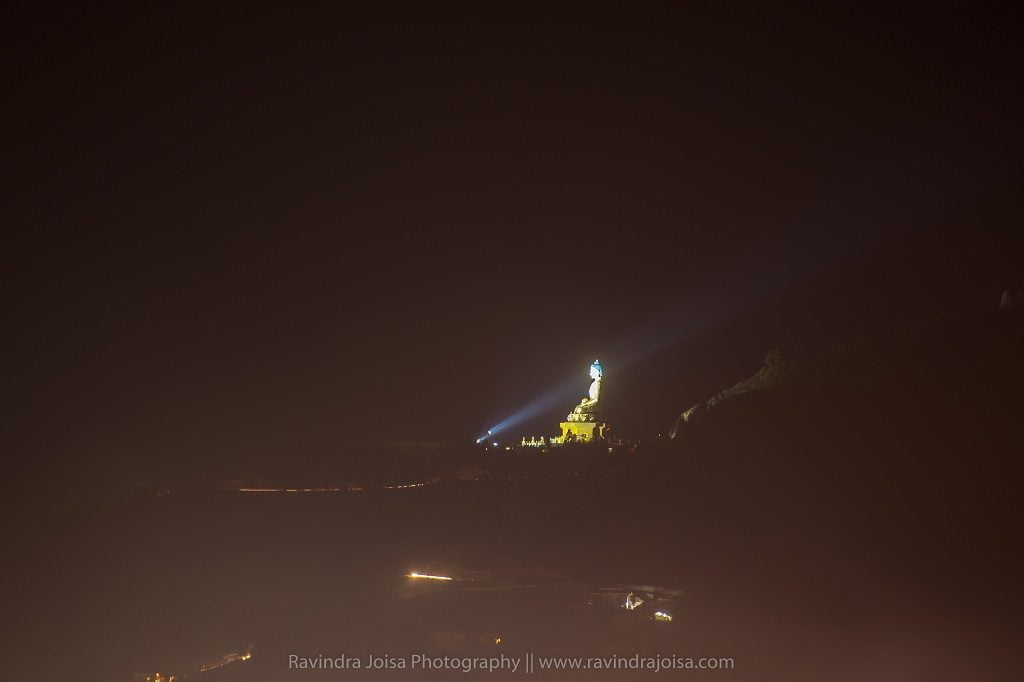
The ideal time to visit would be during summer in Bhutan for those who do not like snowfall. Firstly, this new structure is a must-visit place in Thimphu. Secondly, the lighting at night and the view is from far off, is breathtaking.

Largest statue of Buddha
Zoomed in view from Thimphu

Other places to visit in Thimphu

When you are in Thimphu consider visiting the beautiful Dzong, Thangka painting and art gallery, and National Memorial Chorten. Also, there is a Scottish cafe with some best snacks. We spent some time here in this cafe on a cold night and was a wonderful experience.

From here, you may visit the Dochula (pass) and the Chimi Lhakhang, the fertility temple which is on the way to Punakha Dzong where you can camp overnight. Also, visit the famous suspension bridge which is next to the Dzong, and consider river rafting if time permits. Support my work by joining my FriendZone and following on social media for more travel and photography updates.

For more information, you may visit the Bhutan Tourism website or buy a copy of the Lonely Planet Bhutan book which has all the required information on hotels to stay, cafes, places to visit in detail. Hope you enjoyed reading this blog post. Buy me a coffee to support my work or you can go to my store to buy some of my images. Also, do not forget to join my FriendZone by signing up for my newsletter.

Zanskar River Rafting - Highest and the second toughest in India

The Zanskar river rafting is the most difficult high altitude, highest in the world, and the second most difficult in India. If you're in Leh, this is a must-do adventurous excursion. The Zanskar River is famed for the famous 'Chadar Trek' (frozen river) that takes place during the winter when temperatures drop to minus 30 degrees Celsius. During the summer, the same river is popular for river rafting.

Zanskar River rafting

In the 24-kilometer section of the Zanskar River, there are around twelve rapids and a few whirlpools. There is a shorter, gentler one that is 8-12 kilometers long and has only 3 or 4 rapids. The lengthier one is full of excitement and adventure. Zanskar river rafting is high-altitude rafting at an altitude of more than 11,000 feet, making it the highest in the world. Ascertain that you are acclimatized to this altitude. You may do this by remaining in Leh for two days and doing nothing. After the Brahmaputra, the Zanskar river rafting is the second most difficult in India, with a grade 4 level.

Where can I go rafting in Leh?

The site is on the Leh - Kargil route, near Ladakh Union Territory. Leh is the nearest airport. The organizers' actual site is the Sangam, where the Zanskar and Indus rivers merge to form the Indus River. Zanskar is a tributary of the Indus River that flows north.

zanskar river rafting starting point

Prepare at the campground, which is near National Highway One, with the swimsuit/cold water jacket that they give, as well as the life jackets and helmets. The organizers will transport you to the starting spot, which is roughly 24 kilometers away. The journey to this location is full of adventure, with severe hairpin corners, landslides, no asphalt road in a few spots, and no road railing - one bad move by the driver, and you'll be all the way down in the Zanskar river. The coolest part is that you can stand on the backside of the vehicle. You can see this in the video below.

Zanskar river starting point

The Zanskar river rafting

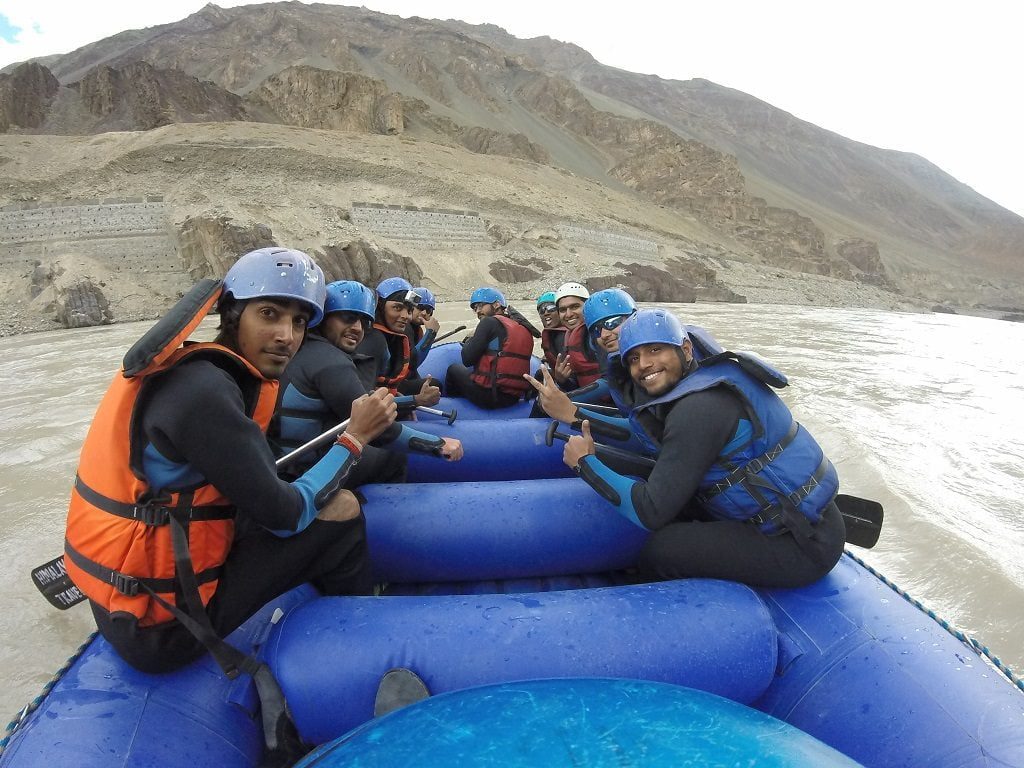
The river rafting adventure begins with a set of instructions and a brief warm-up on how to paddle and so on. The Rapids begins almost instantly. Some of the most hazardous areas at the start and in the middle. After roughly 30 minutes from the start, there is a little pause. After the break, there are a few additional rapids, followed by a whirlpool near the bridge. After we cross the bridge, the remaining few kilometers are completely flat. The entire travel took about an hour. The water is ice cold, and you can even dive near the tent at the further end.

Is Zanskar river rafting safe?

Rafting may also be done on the Zanskar river's rapids. Because the rivers include rapids ranging from level 1 to level 4, you may select the rapid based on the amount of difficulty you are ready to tackle. Rafting in Leh is a safe activity that can be enjoyed with an open mind and an enthusiastic heart.

Zanskar River Rafting

What is the price of river rafting?

The Zanskar river rafting price package costs between 1,000 and 1,500 rupees and includes 24-kilometer travel to the starting location in a jeep or minibus, a swimsuit to protect you from the chilly water, a safety jacket, a guide and instruction expenses, permission, boat, and lunch. The costs of the action camera are an additional 1000 rupees. I recommend bringing your own action camera with a head mount with you.

Zanskar river rafting Safety

Instructions will be given at the start, as well as a guide in the boat while rafting, another guide who will kayak alongside us for the duration of the adventure, a safety jacket, cold water suit, helmet, and a jeep that will follow us on the road that runs along to the Zanskar river. The guides are certified and trained in Rishikesh, another popular river rafting destination in India.

Also, read my other adventure stories and other activities that you can do when in Ladakh.

https://youtu.be/iJKZBC-Eeao

Hope you enjoyed reading this blog post. Buy me a coffee to support my work or you can go to my store to buy some of my images. Also, do not forget to join my FriendZone by signing up for my newsletter. Check out the video below and subscribe to my YouTube channel for more travel and adventure stories.

Capture impressive Cityscape during Nightfall that Stands Out

The cityscape image of buildings and city traffic that you see here is from the outer ring road at Bangalore City in India, usually crowded and full of traffic during daytime. The same place at night looks completely different after sunset. The images captured at dusk adds mood and extra dimension to the image.

Outer Ring Road, Mahadevapura, Bangalore, India

Here are few things that you might want to consider while capturing cityscape at dusk:

  • Capturing cityscape during nightfall requires a sturdy tripod. Read more on Tripod here as Tripod is a must if you want to master low light photography. The free tripod that you get along with the camera is good for your mobile phone or a point and shoot camera and not for your DSLR. I recommend a carbon fiber tripod.
  • Wireless or shutter cable release is a must. This is basically to avoid any kind of camera shake. Also, make sure to tie the camera strap to avoid any kind of movement.
  • A lens with aperture going up to f2.8 will be helpful. Preferably, use 14-24mm f2.8 lens or 50mm f1.4 lens. Wide aperture will allow more light to enter the sensor and hence better image. Higher aperture will allow less light and your camera will auto increase ISO to compensate when in auto mode. This will only add grains or noise when you do photography at night.
Albert Hall Museum Jaipur
Albert Hall Museum, Jaipur, India
  • The first 30-45 minutes after sunset (or golden hours) is the ideal time to capture photos. You can even get some amazing cloudscape that is golden colored and trust me, that looks amazing. Checkout my blog post - Capture Cloud movement using ND Filter to know more.
  • The street light (usually the sodium vapor lamp, incandescent) will be a dominant light source during this time. These days (in India) sodium lights are being replaced by the LED lights and you might need to adjust the kelvin value accordingly.
  • If it is too dark then make sure, fill the frame with well-lit objects. Indirect light source, long exposure, wide aperture can solve the problem of low light photography without increasing the ISO.
Rinpung Dzong, Paro, Bhutan
  • Capture in RAW format so that you can edit later. Always, prefer the RAW format as it will capture all the colors and can be recovered while editing. If you capture in JPEG which is a compressed format, it cannot be recovered.
  • Do not increase the ISO to max unless needed as it might add noise, instead, lower the aperture close to f2.8 or lower and increase the shutter. These days the cameras are good and increasing ISO will not add much noise. Noise will matter only if you want to see images or for professional use. It doesn't really matter for social media usage.
  • While editing, increase the shadows and decrease the highlights. You can do this and recover details from highlights and shadows, provided the image is captured in RAW format.
https://youtu.be/W3cjh8ApMi4

These are some of the basic rules that you need to follow which are simple, to get the best out of your camera. You need not have an expensive f2.8 lens to capture this. Just practice more to get the best out of your camera. Check out the time-lapse of Bangalore cityscape. Each frame in this time-lapse video is a long exposure shot captured for a certain period of time. Watch the video in HD for better quality.

Hope you enjoyed reading this blog post. Subscribe to my website and my YouTube channel for more photography tips and travel updates. Buy me a coffee to support my work or you can go to my store to buy some of my images. Also, do not forget to join my FriendZone by signing up for my newsletter.

Stunning and scenic landscape from Shakar to Haniskot - (Leh Mountain Biking - Day 4)

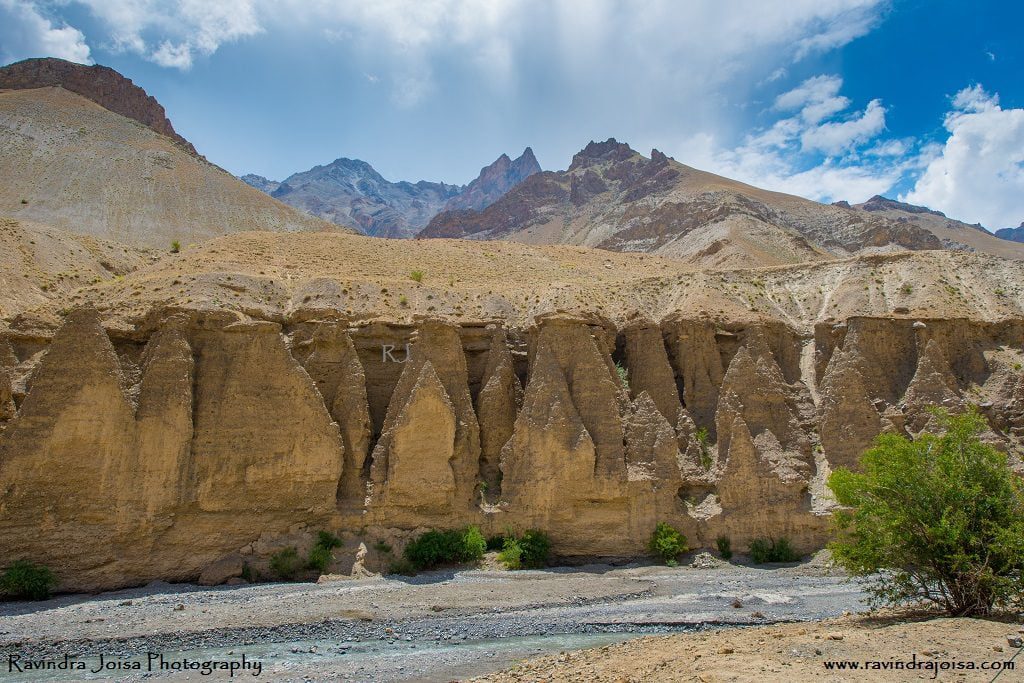
Our stay at a guest home beside the creek in Shakar was fantastic. We toured the area and began cycling on the Khangral-Sanjak route, passing through tiny villages until we reached National Highway One. The surrounding countryside is stunning, resembling a high-contrast picture. Because the area is so unique, soil erosion creates unique structures that have been unspoiled by people. The mountains in the backdrop, the green area in the middle, and the river in the front all appear to be from our elementary school painting class textbooks. On day 4, we traveled 38 kilometers from Shakar 2 to Haniskot.

Sakar to Haniskot

Previous days of cycling to this place

Day1 – Leh to Lamayuru

Day2 – Moonland to Skurbuchan

Day3 - Skurbuchan to Shakar

Shakar to Haniskot

Shakar to Haniskot - Leh Mountain Biking

Exploring Shakar Market road and campsite

Shakar is a lovely campground located near a brook that flows into the Indus. We stayed in an under-construction government guest house named the Tourist Facilitation Centre and spent the evening touring the campground and the surrounding Shakar market road hamlet. It is frequently chilly at night, making it a great location for a bonfire. Investigate the communities in and around Shakar. Try something different in Shakar, such as butter tea or local bread, and stay in one of their houses; after all, it is a one-of-a-kind experience. Make friends with the locals; they can be fantastic portrait subjects if you enjoy portrait photography or wish to film a documentary.

Khangral - Sanjak road

Cross the river across the bridge and continue on the Khangral-Sanjak route we took on day three. As we ride through villages and fields, there are several stores. We get to travel through the green patches and agricultural regions adjacent to the river and the dark multi-hued brown mountain peaks. Continue cycling up and down the mountain, following the Khangral-Sanjak route until you reach National Highway One at Khangral. Take a left at this crossroads, which will lead you to Leh. The road to the right will lead you to Kargil and Srinagar.

National Highway One - Shakar - Leh Mountain Biking

Stay at Haniskot

The most picturesque path is to the left. There are a few little stores along the road where you may stop and enjoy the scenery. Continue cycling till you reach Haniskot, another gorgeous location. Cycling here isn't difficult; just a few ups and downs might be difficult in the sweltering midday sun. Take a rest at one of the surrounding stores on your trip to Haniskot. The scenery is stunning, and it's an excellent location for taking photographs. Finally, we remained at the government bungalow/guest house, which was conveniently located adjacent to the highway.

A visit to remote village Kanji

A kilometer from this bungalow is a road to the right that takes you to a place named Kanji which is about 12 kilometers from the junction. The journey to this location is beautiful. The YHAI itinerary does not include a visit to Kanji. We arrived at Haniskot much early, and it was up to us to explore. A few of us who had the energy went a little further. The entire distance between Kanji and Tokyo is around 26 kilometers.

https://youtu.be/VfEzqrgVdfM

This cycling expedition was organized by the Youth Hostel Association of India and as you are reading this post, and interested in outdoor activities then check out the National trekking expedition in Goa. To get a sense of the location, watch the video above. Hope you enjoyed reading this blog post. Buy me a coffee to support my work or you can go to my store to buy some of my images. Also, do not forget to join my FriendZone by signing up for my newsletter and SUBSCRIBE to my YouTube channel.

Shoot in RAW format to get Incredible images

Nowadays, the majority of photographers record photographs in RAW format. Taking photos in RAW format provides advantages over taking photos in JPEG format. Most DSLRs and powerful compact cameras have the ability to take photographs in RAW format (.NEF format in Nikon, CRII format in Canon, etc). RAW images are frequently referred to as digital negatives.

Raw format - image after editing

Importance of capturing in RAW format

When photographs are recorded in JPEG format, the color information is compressed by the camera's built-in software (permanent loss of color information in an image). The JPEG image has around 250 odd color information, but the RAW image contains several thousand color information.

The photographer then downloads the RAW photographs from the memory card. The image is then tweaked to get the desired white balance, contrast, exposure, saturation, color, sharpness, lens correction, and so on. One of the most recent additions is the 'Dehaze' option in Lightroom when editing, which is quite handy. The ultimate output of a picture is determined not only by the image that is acquired but also by the editing abilities of the user.

RAW Format - Pre and Post editing

It is worth noting that the size of a RAW format image is significantly larger, nearly double that of a high-quality JPEG image. The size of the JPEG image is determined by the type of JPEG format used while capturing the image.

When do I capture images in RAW format and in JPEG?

  • Whenever I am on a photo assignment, project, paid photo shoot, photos that I plan to sell; I make sure that the images are always captured in RAW format.
  • The not so important, casual shots of known and unknown friends, unpaid work is something that I prefer to capture in JPEG.
  • My memory card was almost full. It happened to me during one of my Himalayan treks and I will not be traveling to that place again (as I have many more places to cover). My memory card was almost full and If I were to capture images in RAW format, it would almost double the space. I had two options - either to continue capturing images in RAW format and ignore the important shots later in the trekking trail or capture in JPEG (which takes half the space) and capture all the photos. I opted for the second.
  • If you are lazy and fine with JPEG quality and with what your camera has captured, then go ahead with JPEG.
  • Go for JPEG if you don't want to edit an image.
  • I have seen some of the photojournalists/war photographers capturing images in JPEG, where one of the conditions is not to edit images and the images are to be delivered in no time.
Surathkal Beach, Copyrighted to Ravindra Joisa
Surathkal NITK Beach, Copyright: Ravindra Joisa

Here's an example: in the above image, the foreground seemed dark and was subsequently modified by raising the shadows to be in details. The same is true for the backdrop sky, which was blown out in the original photograph. However, because it was captured in RAW format, I was able to retrieve the information from the sky region by reducing the shadows. You may do the same with JPEG photos, but the image quality suffers as a result. It will also be unsuitable for professional use. Note that the above image was captured after the sunset and the actual image appeared dark.

How to edit RAW format images?

The RAW format image always appears dull and is an incomplete image. It has to be processed using a photo editing software like Adobe Lightroom or Photoshop or other image editing software. Note that the RAW format images are not supported by the websites and has to be converted to JPEG or PNG format. I would highly recommend to super compress if it is for websites so that the image can load fast. By the way, you can go through my courses to know more on how to edit using Lightroom.

Subscribe to my blog and Youtube channel. Hope you enjoyed reading this blog post. Buy me a coffee to support my work or you can go to my store to buy some of my images. Also, do not forget to join my FriendZone by signing up for my newsletter.